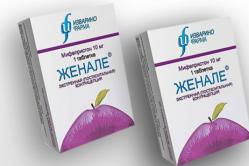
Antipyretics for children are prescribed by a pediatrician. But there are emergency situations with fever when the child needs to be given medicine immediately. Then the parents take responsibility and use antipyretic drugs. What is allowed to be given to infants? How can you lower the temperature in older children? What medications are the safest?
There are different cards for the mafia - humorous,. Therefore, first decide which format you like and download the template you like. Free, of course. All downloads on our website are free, especially for game fans.
What size?
How to make mafia cards from paper? The mafia role card that fell into your hands during the distribution should under no circumstances be seen by your neighbor. What am I talking about? It may be worth shrinking the template so that the card fits completely in the palm of your hand. However, it all depends on habit. Some people find it more convenient to hold “poker” cards in their hands, while others prefer “solitaire” cards.
Paper grade
In general, I would advise buying a mini-pack of photographic paper specifically for this task. The costs are small, but you will get dense, glossy cards straight from the printer. Almost like it came from a store. We separated the matrix with a clerical blade, and immediately received a deck ready for use.
How to make mafia cards from paper? You can also print cards on plain paper. Just to increase the strength and thickness, you will need to glue cardboard under the main sheets before cutting. And then put the cards under a press so that they don’t bend after drying, and wait about half an hour.
For the New Year, I want to give my loved ones attention, make a pleasant, useful (and beautiful!) surprise that will delight friends or family for a very long time. As you know, the best gift is one made with your own hands. Yes, this time I can admit that my task of finding a suitable gift was greatly facilitated, since my godchildren have been interested in pirate themes for more than a year. The answer to the question “What to give for New Year? was found.
It's no secret that I run my own travel blog. In my work on preparing materials, I work a lot with maps and diagrams, I am guided by scale and can easily explain to others, or. Therefore, the idea of creating a full-fledged treasure map, a “pirate map,” really appealed to me. At the same time, it was decided to capture the work process for people who are interested in handmade.
Several sheets of A3 and A4 were taken as a basis (I took 4 of each type). When creating a pirate treasure map, you always need to depend on the texture of the paper, since it is this that determines the map as a pirate or not a pirate. Tea and coffee were used to add color and texture.
I took a small bowl, 4 tablespoons of any instant coffee and 5 tea bags of black tea, filling it all with 250 ml of water (a large glass). Mixed thoroughly and waited until everything was infused. Then I took out the bags and put them on a separate plate (we will need them later). I poured the contents of the bowl into a baking tray to hold the paper there. The paper was crumpled as much as possible before impregnation.

You don’t need to wait long, just saturate the sheet on one side and the other with the solution, the color saturation does not depend on the amount of impregnation time - this was found out experimentally. Then everything was placed on spread newspapers to dry. As soon as the sheets began to dry out, I took the bags left during the previous operation and squeezed drops of a thick solution from them onto the sheets in a chaotic manner. This is necessary for the appearance of additional random “spots”, so that the texture becomes even more interesting.

Ready material for work.

I sharpened it in Photoshop so that the pattern was visible.
In general, creating a pirate map brings great pleasure, since even if you accidentally drip glue or varnish onto the surface of the paper, this will not deteriorate it appearance, but it will improve - who knows how many troubles the old pirate had to go through with her?
I ironed the final sheets with an iron, then sanded them with sandpaper to remove shine from the iron and a rougher surface. I took the grain size small so as not to damage the paper.

After this, the question arose about what kind of drawing and what to apply it with. The choice fell on gel pens in three colors: black, gold and silver. We draw an outline with black, give gold and silver a beautiful shade that plays in the light.

The first tests showed that we are moving in the right direction. Cardinal directions on the map. How to draw: use a compass to draw 2 concentric circles of different diameters, then make crosses: cross to cross at an angle of 90 degrees, then cross to cross at 45 degrees, then in half again. We use the resulting markup to create this. We paint the “star” volumetrically with gold and silver.

In general, the Internet is simply replete with various images of treasure maps and pirate drawings various types: it all depends on the purpose for which you are making the map and how much time and effort you are willing to spend on it.
My goal was to make props for a fun puzzle game for my nephew and niece for New Years. The essence of the game is as follows: Take a map where four sectors are marked. Each one should have its own piece of the map. To find the treasure, you need to find all 4 pieces by solving riddles and puzzles. This becomes clear from the following figure:

Next, we take a plan of the area where the game will take place. I drew from memory, guided by photographs. We draw in such a way that the child can understand (if anything happens, mom and dad will help. Place the pieces on the map itself:

It turns out to be a kind of puzzle: children will not only need to find a piece of the map, but also find the place assigned to it. For this I made a stroke. More photos:


I bet even adults with topographical cretinism will be fascinated by this challenge. Very exciting.
The game can be used everywhere: on vacation, at corporate events. A treasure map is an intuitive thing and everyone knows what to do with it. A compass can be purchased at any fishing store. Mine will be guided by the weather vane on the roof.

After creating the base and the puzzle, I wanted more. How will the card be stored? How to wrap and fold it? Fold in quarters? This will kill her. I remembered the idea of a scroll: you need a cylindrical object larger than an A4 sheet, and something that will fix it. After searching through the options, a broken photo roll from an A3 printer and a video from the same were chosen. The card will be rolled onto the photo roll; the roller gives a pleasant weight.


In movies, it is customary for the scroll to have a protective apron that limits the folding of the card and allows it to be rolled up and unrolled. After creative agonies, the starting material was chosen: polystyrene foam. After processing with a hot knife over the stove, it acquired the following shape:

My beauty! Now we need to make the second one the same.

To prevent the limiter discs from turning, it was decided to treat them with papier mache, which was soon done. It was not possible to take photographs of this process. After drying, the end surface of the tube and the disks were treated with black plasticine. At the same time, plasticine for “wax seal” was prepared.

Then everything was glued onto a tube and treated with varnish so that the plasticine would not stain.

Please note: the distance between the disks is selected in such a way that a roller can be inserted there. At the processing stage, grooves were made. After drying, close-up:

The design is such that the card rotates freely around the roller. It is possible (but not recommended) to open the card under the weight of the roller itself: it will unwind.

We glue the joints of the sheets with PVA glue.

We check the functionality.

Here's what it looks like expanded:

The compactness of the map design itself and the abundance of “white spots” are a bit of an eyesore. I agree, you can fill the entire surface with patterns and drawings. But for my task this is enough.
We make a wax seal: knead the plasticine of the desired color (80% red and 20% black), take the twine, wrap it in the required way, and mold the “wax sealing wax” itself onto a small piece of the same material as the card, so that when torn off the main object does not deteriorate. We make an impression using another piece of plasticine where the drawing was made, and then frozen in the freezer. We coat it with varnish for a wax shine. Ready!

My stamp is made in the form “ all seeing eye" Who said conspiracy theories? It's just a simple and beautiful drawing. Close-up again. Not ideal, but just right for something that will be torn off and thrown away.

Card with other attributes for the New Year competition. 
Ready! This text is not a strict instruction, it gives a lot of scope for creativity and finding different ways, so - get creative, let your map become even more detailed and beautiful! Well, that’s all I have! Happy New Year 2015!
Maps first appeared in the Middle Ages. The main countries in whose chronicles they are mentioned are China, India, Asia, and Korea. They appeared in Europe much later and were not widely used at first, as they were subject to constant bans. Especially from the church.
Then they were made from different materials, from stone to papyrus. Today there are simply a lot of options for how cards are made. Let's look at the most common modern materials for deck production.
- Paper (cardboard).
- Plastic
- Vinyl.
Cardboard playing cards
The most common and cheapest raw material in this area. Cardboard decks are made using three main technologies:
- lithography is a method of flat printing, which is based on the physical and chemical process of obtaining an impression from a stone and the absorption of special lithographic ink;
- photolithography is a method of obtaining a given pattern on the surface of the desired material (includes several complex technological processes: electrodeposition, etching, vacuum deposition, sandblasting);
- intaglio printing (another name for intaglio) is the use of a special printing form to obtain an image and print.
The main raw material component in the production of paper pictures is the polymer cellulose acetate. This is a thin polymer film that goes through all three stages of processing, is laminated and turned into a playing card.
It is important! Paper maps are undoubtedly cheaper. However, their quality is not very high, and they quickly wear out and become unusable.
Making a deck from plastic
 The technology is the same as for paper maps. Only the raw material component, the polymer cellulose acetate, is covered with a dense layer of plastic on top, which makes the product more beautiful and reliable. They no longer wrinkle, become deformed and get dirty. They practically do not rub and last a long time. But their cost is an order of magnitude higher than paper ones.
It is important! The thicker the layer of plastic on the cards, the more expensive and better quality they are.
Making cards from vinyl material
The most common cards for home use due to its wide availability. The manufacturing process repeats the previously described stages. Raw material: vinyl. The result is as follows: the cards are quite durable and inexpensive, but they are very easy to damage due to mechanical stress. 
In some cases, making tarot cards with your own hands is much more profitable than buying them. For example, if you type “Buy Tarot of Shadows” into the Yandex search, you will see that the price is very steep. At the time of writing, there was no price less than 2000 rubles for this deck. Moreover, the cards, most likely, are not from the official publisher, but were also made by someone else. Therefore, it’s worth considering whether it makes sense to overpay or whether it’s worth getting a little confused and making tarot cards yourself.
If the decision falls on manual production of cards, then you will need:
- Color printer. Some people do it on black and white printers, but this is not correct. In many decks, color plays an important role.
- Thick paper. The thicker the paper, the better. But less than 250 g/m2 is not recommended. The cards will be too thin. Before purchasing, make sure that the printer can print on such thick paper.
- Lamination material. You can use transparent Oracal film, transparent adhesive film, “thermal film”, adhesive tape, some are laminated on special machines (often found in stationery and advertising agencies), this is a matter of taste and preference.
- Plastic card or plastic scraper. This item will be needed if the cards will be laminated with self-adhesive film.
- Iron. An iron is needed if you use thermal film.
- Scissors or utility knife.
Tarot card making process:
- Creating a template (placing cards on a piece of paper)
- Seal
- Lamination
- Cutting out cards
PREPARING THE TEMPLATE
Before you start doing anything, you need to decide on the deck that needs to be made and download images of the deck cards. The better the quality of the card images, the better the quality of the printed cards. Quality is determined by image resolution (the higher the better) and visually (the picture should be bright, clear, without extraneous inscriptions).
If the cards are one-sided, i.e. without a shirt, there shouldn't be any problems. We simply place the images on the sheet in a convenient graphic editor (photoshop, coreldraw, etc.) and print. Before printing, do not forget to set the required print quality. It is best to set it high, so the cards will turn out brighter and more beautiful, but more paint will be required
To print cards on both sides, you may have to tinker a little, because... When creating a template, you need to ensure that the images of the front and back sides of the cards match (that is, so that when cutting, one of the sides does not get cut off). It should look something like this:
To print using the template provided, the sheets must be flipped over the long edge.
Ready-made Tarot card templates can be downloaded.
If the required deck is not on the website, you can do everything yourself. First, download and install Photoshop if you don't have it. Then move the images of the selected cards into Photoshop and place them exactly on top of the black rectangles. Just in case, save the finished sheets using the “Save As” function; do not forget that the sheets need to be given different names, otherwise one sheet will be saved and the other will be deleted.
But even if you use a ready-made template, make a test print on a plain sheet of paper in the lowest quality and see if the front side and back of the cards match (look through the sheet at the light source).
PRINTING CARDS
As stated above, you need paper with a density of 250 g/m2. If the paper density is less, the cards will turn out very thin and soft.

Before purchasing paper, you should make sure that the printer can print on thick paper. Some printers may not have this functionality.
If everything is fine, then we print the cards using the maximum print quality.

But it happens that the ink runs out in the middle of a sheet, so it makes sense to monitor how each sheet is printed.
In order for the front side of the cards and the back to match, you should load one sheet at a time into the printer and make sure the position of the sheet in the printer is the same.
LAMINATION
Laminating tarot cards printed on a home printer is almost mandatory. If the cards are not laminated, they will quickly lose color and become frayed.
When creating the very first decks, film was used for textbooks/books with an adhesive backing, but then film was tested that was glued with an iron. So, the film, which is glued when heated with an iron, turned out to be much more convenient for lamination and there is less waste with it. Both types of film can be found in office supply stores.
If you laminate with a film with an adhesive layer:
- Cut a piece slightly larger than a leaf
- Glue a little to the table. First, the middle of the film is glued. Then draw your finger from the middle to the left, gluing the film. We take the non-glued end of the film and tear the film almost all the way from the table, leaving 1-2 cm glued. And now from the glued strand we glue the non-glued part of the film with our finger.
- Slowly begin to laminate the sheet using a plastic card or similar object
- Cut off the excess film and laminate the other side.
If you laminate with thermal film:
- Cut out the required piece, preferably a little larger than a sheet
- Lays down laminated sheet
- Film on top of the laminated sheet
- Another blank sheet on top
- Laminate with a hot iron
- The excess is cut off and the second side is laminated
When laminating with thermal film, do not mix up the sides of the film (one of the sides sticks).
Before gluing the film with an iron, you need to make sure that the film under the sheet lies without wrinkles.
Don’t get carried away; if you overexpose the iron, you may end up with a defect.
At first it may not work out, therefore, in order not to spoil the printed sheets with future tarot cards (reprinting cards is an additional expense of ink and time), it is better to practice on simple blank sheets. To reduce the amount of waste, you can cut a sheet of cards into several parts and then laminate them (up to laminating each card separately).
CUTTING
Well, all that remains is to cut out the manufactured tarot cards and the job is done. For cutting, you can use scissors or a stationery knife with a ruler.

With a knife it turns out faster and smoother, but you need to act carefully and carefully to avoid injury. When cutting with a utility knife, it’s a good idea to put plexiglass, plywood or some other material underneath so as not to damage the table (or whatever you’ll be cutting on).
Another point when cutting is rounded corners. Everyone decides for themselves whether to do them or not.
At the time of writing, several tarot decks had already been made using this method. Namely, the Tarot of Dwarves, Tarot of Shadows, Tarot of Manar and Koshchyuny speak the truth.

Example of ready-made cards